Oblivion:Dasek Moor
|
|||
|---|---|---|---|
| # of Zones | 3 | ||
| Occupants | |||
| Marauders, Undead (1 boss-level Marauder) |
|||
| Important Treasure | |||
| 1 boss-level Chest | |||
| Console Location Code(s) | |||
| DasekMoorExterior, DasekMoor, DasekMoor02, DasekMoor03 | |||
| Region | |||
| West Weald | |||
| Location | |||
| South of Kvatch | |||
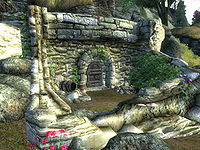
Dasek Moor is a medium-sized fort south of Kvatch containing marauders and undead. It contains three zones: Dasek Moor, Dasek Moor Tombs, and Dasek Moor Maleboge.
Notes[edit]
- The E3 video shows that Dasek Moor was originally written down on the in-game map, similar to Brina Cross. A city fast-travel icon also appears at this location, indicating either that a settlement could originally be found here, or that the map marker simply had not been finalized yet. The name shown on the map also differs from the final name, being written down as "Dasok Moor".
- Dasek Moor also appears in ESO.
Bugs[edit]
- This fort is labeled as a mine on your map.
The Unofficial Oblivion Patch fixes this bug.
- Dasek Moor Maleboge appears to be a misspelling of "Malebolge".
The Unofficial Oblivion Patch fixes this bug.
Exterior[edit]
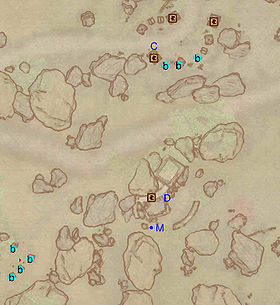
- The exterior is located at coordinates: Tamriel -36, -8
- This location's map marker (M on map) is named Dasek Moor (editor name DasekMoorMapMarker). The entrance door is N of the marker, 40 feet away.
- 0-1 Campsite Bandit (each 50% probability melee Bandit, 25% archer Bandit, 12.5% Bandit Hedge Wizard, 12.5% dog) is near the entrance
- The following plants can be found near the entrance: 3 Alkanet plants, 2 Aloe Vera plants, 5 Bergamot plants, 3 Cinnabar Polypore plants, 2 Columbine plants, 1 Dragon's Tongue plant, 2 Dryad's Saddel Polypore plants, 2 Elf Cup plants, 3 Emetic Russula plants, 1 Fennel plant, 8 Flax plants, 1 Lady's Mantle plant, 1 Lady's Smock plant, 7 Milk Thistle plants, 4 Morning Glory plants, 4 Motherwort plants, and 5 Primrose plants
- 7 bedrolls are at locations b on map
Zone 1: Dasek Moor[edit]
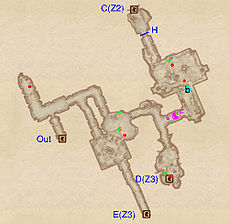
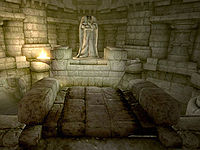
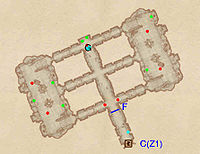
Upon entering Dasek Moor from door Out, head east at the intersection as the western tunnel leads to a dead end. You will encounter two paths. Both of them leads to the same two-leveled room; the first path will take you to the lower level and provides access to a tunnel leading to door E, one of the two available entrances to Dasek Moor Maleboge. The second path leads to the upper level, with a patrolling Marauder, two chests and what appears to be a Shrine overseen by a headless statue. Head east through the iron gate, then face another intersection; proceeding forward will take you to door D, the second entrance to the Maleboge, while taking the eastern tunnel will land you near door C, the only entrance to Dasek Moor Tombs. If you go for the Tombs, beware of the Pressure Plate at G, which will release the three Swinging Mace traps at F and remember a few lockpicks for the locked gate at H.
Occupants:
- 1 Campsite Marauder (each 50% probability melee Marauder, 16% archer Marauder, 16% Marauder Battlemage, 16% dog)
- 1 Marauder Battlemage
- 1 archer Marauder
- 1 melee Marauder
- 1 Rat
Treasure:
Traps:
- 1 Pressure Plate trigger at location G on map
- 3 Swinging Mace traps at F
Doors and Gates:
- There are four doors in/out of this zone
- 1 door (at Out) leads outside
- 1 door (at C) leads to the zone Dasek Moor Tombs
- 2 doors (at D and E) lead out of dungeon to Dasek Moor Maleboge and Dasek Moor Maleboge
- 1 Gate at H (locked)
Other:
- 1 bedroll at location b on map
Zone 2: Dasek Moor Tombs[edit]
When you enter the Tombs from door C, you will witness a lone marauder fighting a whole gang of undead enemies behind the gate at F. Let the enemies dispose of each other, then pull the lever (cyan dot on map) and fight the remaining enemies. This is a typical tomb-like structure and you can explore it any way you want. On each side of the central passage are two chambers with several coffins, most of them without any valuables, although they are worth searching as a few of them contains minor loot and gold. A dead marauder can be found near two chests at the northern end of the central path.
Occupants:
- 1 melee Marauder
- 1 Bones Undead
- 5 Undead Enemies (each 83% probability Undead, 17% Rat)
Treasure:
- 1 Chest 01 (locked)
- 2 Chests 04
- 4 Coffins 02
Doors and Gates:
- There is one door (at C) in/out of this zone, leading to the zone Dasek Moor
- 1 Portcullis Gate at F
Other:
- 1 Dead Marauder (wearing heavy boots and cuirass) at location G on map
Zone 3: Dasek Moor Maleboge[edit]
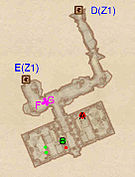
Upon entering Maleboge from either door D or E (if you chose the latter, watch out for the pressure plate trigger at G), head south at the first intersection and follow the tunnel to a huge room with three levels, several statues, a boss-leveled marauder at A and an archer strategically placed at the bottom of the first set of stairs. After the inevitable fight, loot the boss chest at B and search the room for minor loot, then head back to Dasek Moor; if you have not yet cleared Dasek Moor Tombs, door D is the most convenient choice. Be careful, because a marauder battlemage is hiding behind door D in the Dasek Moor zone.
Occupants:
- 1 boss-level Marauder at location A on map
- 1 archer Marauder
Treasure:
- 1 boss-level Chest (Marauder variety) at location B on map
- 1 Chest 02 (locked)
- 1 Chest 04
- The following ingredients will always be found: 1 Bread Loaf and 1 Cheese Wedge
Traps:
- 1 Pressure Plate trigger at location G on map
- 3 Swinging Mace traps at F
Doors and Gates:
- There are two doors (at D and E) in/out of this zone, both leading to the zone Dasek Moor
