Oblivion:The Old Way
|
||
|---|---|---|
| # of Zones | 5 | |
| # of Welkynd Stones | 18 | |
| # of Varla Stones | 0 | |
| Occupants | ||
| Ayleid Guardians, Undead (1 boss-level Undead) |
||
| Important Treasure | ||
| 1 boss-level Ayleid Coffer 1 boss-level Ayleid Reliquary 1 boss-level Chest 1 Blade Skill Book 1 Chest |
||
| Console Location Code(s) | ||
| ImperialSewerSystemTG11a, ImperialSewerSystemTG11a2, ImperialSewerSystemTG11b, ImperialSewerSystemTG11c, ImperialSewerSystemTG11d | ||
| Location | ||
| Beneath the Imperial Palace | ||
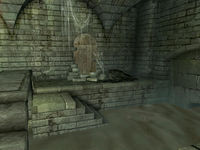
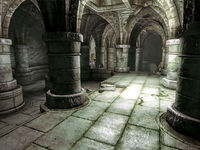
The Old Way is a large Ayleid ruin underneath the Imperial City containing undead (quest-related). It contains five zones: The Old Way (1), The Old Way (2), The Lost Catacombs, Hall of Epochs (1), and Hall of Epochs (2).
Related Quests[edit]
- The Ultimate Heist: Steal an Elder Scroll for the Gray Fox, and for glory!
Notes[edit]
- This ruin can only be entered via the Palace Sewers and is therefore inaccessible until you start the related quest.
- The first part of this ruin is likely copy pasted from the Imperial dungeon with very minor changes, since a lot of rooms are completely identical.
Zone 1: The Old Way[edit]
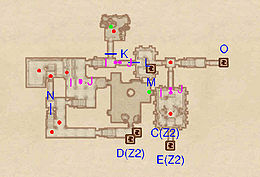
Upon entering The Old Way from The Palace Sewers, the surroundings instantly change to a more traditional ruin and the game rightfully informs you that a "long journey" is ahead. This first zone is not difficult to explore, nor is it difficult to proceed to the next zone, as three doors, C, D and E, respectively, are in close vicinity to each other and will all lead you there, although door D is the only one not requiring lockpicking skills. A peek towards the ceiling at M shows your escape route from the Battlemage's Chambers later in the related quest.
The quickest way to the next zone is through door E, which can be reached by heading directly south from the entrance. The rest of the ruin only contains two chests with minor loot, but if you want everything, proceed west through the locked door at L, avoid the Pressure Plate at J and unlock the nearby iron gate at K for some treasure and an Undead enemy. Continue west and locate the broken wall near another Pressure Plate trigger (J) and head into a tomb-like structure and claim the potions from the chest. Finally, choose one of the three exits leading to the next zone; The Old Way.
Occupants:
Treasure:
Traps:
- 3 Pressure Plate triggers at locations J on map
- 3 Swinging Mace traps at I
Doors and Gates:
- There are five doors in/out of this zone
- 3 doors (at C, D, and E) lead to the zone The Old Way
- 2 doors (at O and M) lead out of dungeon to The Palace Sewers and Imperial Battlemage's Chambers
- 2 Doors at L and N (both locked)
- 1 Iron Gate at K (locked)
Zone 2: The Old Way[edit]
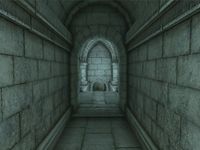
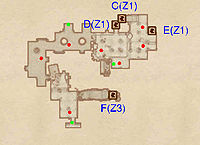
Unlike the first zone of the same name, part two of The Old Way is entirely linear. Whether you arrive from door C, D, or E (the latter two provide easy access to a minor loot chest in an alcove above ground level), simply proceed through the hole in the western wall and make your way through the tomb and fight or sneak past the rats and undead enemies you encounter. Make sure to loot the two other chests along the way (green dots on map) and head through door F to a much larger and challenging area, The Lost Catacombs.
Occupants:
Treasure:
Doors and Gates:
- There are four doors in/out of this zone
- 3 doors (at C, D, and E) lead to the zone The Old Way (locked)
- 1 door (at F) leads to the zone The Lost Catacombs
Zone 3: The Lost Catacombs[edit]
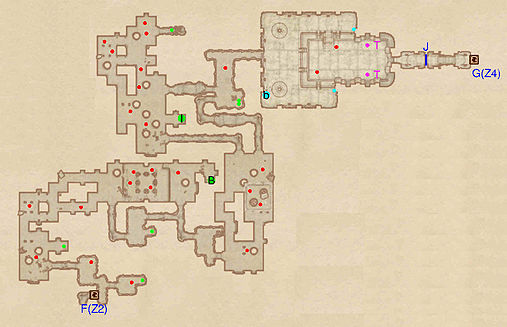
The Lost Catacombs is quite large, but fairly linear to explore, even if you will have to take a few detours along the way. The place is virtually crawling with enemies, so prepare yourself for a long and exhausting trek. Upon entering from door F, take an immediate right and search the small room for treasure. Proceed east and follow the path in a clockwise direction, fighting the countless undead enemies along the way. When you reach a large room with 8 wooden pillars, make sure to find the boss-leveled chest at B in the northeastern tunnel. Backtrack and head south, then go north at the intersection until you reach a room with two tunnels leading north. Choose the westernmost passage and loot the chest at I for a rare copy of Aevar Stone-Singer and some valuable loot. This area contains up to 8 enemies that can group up on you, so proceed with caution, and ignore the northeastern chest (green dot on map) if you are in a tight spot. Head west and loot the two chests for useful potions, and proceed north to the final room of the zone.
This large room is built in typical Ayleid style and contains two enemies along with two harmless Dark Welkynd Stones. Dispose of the enemies and locate the broken staircase leading up to the level above. With high Acrobatics skill, or by using the Boots of Springheel Jak to your advantage, it is possible to reach the upper level; once there, locate the two push buttons (cyan dots on map) which will remove the gate at J. Note the bedroll at b, right next to a pile of bones still holding a steel battle axe and equipped with steel boots and a cuirass. Jump back down and proceed to door G, which leads to the Hall of Epochs.
Occupants:
Treasure:
- 1 boss-level Chest (Undead variety) at location B on map
- 1 Chest (contains Aevar Stone-Singer, 10% soul gems, 10% armor, 10% weapon) at I
- 2 Chests 01
- 1 Chest 02
- 3 Chests 04
- The other following items will always be found: 1 Steel Boots, 1 Steel Cuirass, and 1 Steel Battle Axe
Traps:
- 2 Dark Welkynd Stone traps at locations T on map
Doors and Gates:
- There are two doors in/out of this zone
- 1 door (at F) leads to the zone The Old Way
- 1 door (at G) leads to the zone Hall of Epochs
- 1 Iron Gate (opened remotely) at J
Other:
- 1 bedroll at location b on map
Zone 4: Hall of Epochs[edit]
Inital Foray[edit]
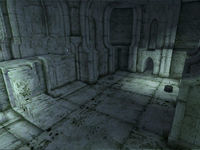
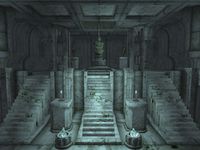
From door G, proceed into the semi-large room and claim the four Welkynd Stones from the pedestals. Head east and land in a very large Ayleid chamber and take a look around; this is the end of a long journey, but quite a few obstacles await before you can enter the Guard Quarters of the Imperial Palace through door K. At this point, the door is non-existent and you will have to solve a few puzzles for it to open. Dispose of the enemies on the ground level, claim four additional Welkynd Stones, then head up the stairs to the two currently petrified Ayleid Guardians on each side of a statue at O. Follow the ledge around and notice two large pillars blocking your way to the Pressure Plate at N. Jumping to the Plate is nearly impossible, although high Acrobatics will help; unfortunately, doing it this way causes the two Dark Welkynd Stones at T to activate, so instead, locate the locked gate at L and open it. Take an immediate left on the balcony and claim the contents of the boss-leveled Ayleid Coffer at B, then activate the push block nearby; it will lower a wall downstairs at M, so jump down, find the new entrance and proceed forward to door H leading to the fifth zone, also named Hall of Epochs.
Second Foray after Lowering the Pillars (See Zone 5 Below First)[edit]
When you reenter this zone from door H, after having activated the push button in the depths of the separate part of the Hall of Epochs, the two pillars will be gone, the Dark Welkynd Stones will be deactivated and four enemies will have spawned in the area, among them a guaranteed Skeleton Archer carrying a bow, in case you did not bring your own. Dispose of all the enemies and pick up the bow then position yourself on the Pressure Plate at N. When activated, the statue in the opposite side of the room slowly turns around, revealing a small light-blue spot on its chest, the keyhole that the Arrow of Extrication fits. Equip your bow with the arrow and aim above the keyhole; despite what the journal says about having only one chance, if you miss, simply head down and reclaim the arrow, and then try again. When the arrow finds its target, the entire statue will be elevated and the entrance to the Imperial Palace will finally be accessible. As you approach the door, defeat or simply sneak past the two Ayleid Guardians that will come to life if they detect you. If you do decide to fight them, dispose of them before entering the Palace, noting that both their weapons will crumble to dust when you pick them up nor is it possible to loot their bodies. Proceed down the stairs to the revealed entrance at K and the door will lock automatically behind you, though you can still access the ruin through the Palace Sewers.
Occupants:
- 2 Ayleid Guardians (non-respawning)
- 1 Skeleton Archer
- 3 Zombie Undead
- 3 Undead
Treasure:
- 1 boss-level Ayleid Coffer (Monster variety) at location B on map
- 1 Chest 04
- 8 Welkynd Stones
Traps:
- 2 Dark Welkynd Stone traps at location T on map
Doors and Gates:
- There are three doors in/out of this zone
- 1 door (at G) leads to the zone The Lost Catacombs
- 1 door (at H) leads to the zone Hall of Epochs
- 1 door (at K) leads out of the dungeon to the Imperial Guard Quarters
- 1 Gate at L (locked)
- 1 Hidden Door at M
- 2 Iron Gates (opened remotely) at I and J
Other:
- Keyhole Pillar at location O on map
- 1 Pressure Plate at N
Zone 5: Hall of Epochs[edit]
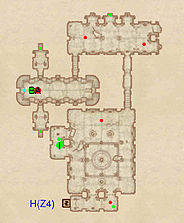
Your objective in this zone is to find the push block that will remove the pillars in the previous zone, Hall of Epochs. Fortunately, the path is quite linear and contains loads of valuable loot, so proceed forward from door H and pry open the Ayleid Cask. Head into the large room, dispose of the enemies and collect six Welkynd Stones from the pedestals. Examine the western wall for a small room with two Ayleid Casks and a chest at I, one of them containing the ultra-rare Blade skill book Fire and Darkness, the only copy in all of Cyrodiil. Locate the northeastern tunnel leading downstairs and use the boots once again to reach the remaining four Welkynd Stones, placed on high pedestals. In the southwestern corner, another set of stairs will take you down another level, to the final room where you will locate both the push button (cyan dot on map), a boss-leveled Undead at A and a boss-leveled Ayleid Reliquary at B. When all is said and done, backtrack all the way to the previous zone and prepare for the final showdown.
Occupants:
- 1 boss-level Undead at location A on map
- 4 Undead
Treasure:
- 1 boss-level Ayleid Reliquary (Undead variety) at location B on map
- 1 Ayleid Cask (contains Fire and Darkness (Blade Skill Book), 10% chance armor, 10% weapon) at I
- 1 Ayleid Cask 01
- 1 Ayleid Cask 02
- 4 Chests 04
- 10 Welkynd Stones
Doors and Gates:
- There is one door (at H) in/out of this zone, leading to the zone Hall of Epochs
