Oblivion:Imperial Prison Sewer (Tutorial)
|
|||
|---|---|---|---|
| # of Zones | 6 | ||
| Occupants | |||
| Rats, Goblins, Undead Mythic Dawn Assassins |
|||
| Console Location Code(s) | |||
| ICPrisonSewerExit01, ImperialDungeon01, ImperialDungeon04, ImperialDungeon05, ImperialDungeon02, ImperialDungeon03, ImperialSewers03 | |||
| Region | |||
| Heartlands | |||
| Location | |||
| Northeast of the Imperial City, across the water from Vilverin | |||
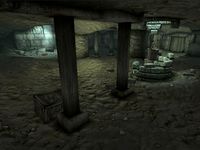
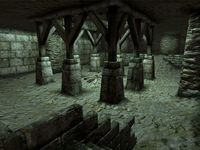
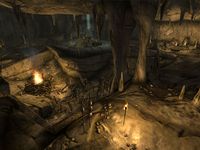
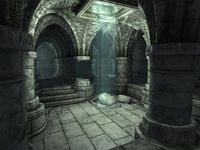
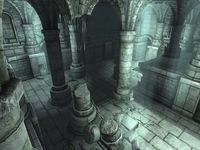
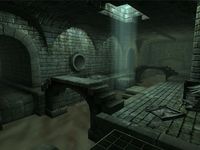
Imperial Prison Sewer is a large sewer northeast of the Imperial City where the tutorial takes place. Later, it may be seen as Imperial Prison Sewer (Scheduled for Execution). It contains 6 zones: Imperial Prison, Imperial Substructure, Natural Caverns, Imperial Subterrane, The Sanctum, and Sewers.
Quests Starting Here[edit]
- Tutorial: You must follow the secret escape route to escape the prison.
- Deliver the Amulet: You must deliver the Amulet of Kings to Jauffre in Weynon Priory.
Notes[edit]
- Be sure not to leave any valuables in this sewer after finishing the tutorial, as the entrance door is locked upon completion of Deliver the Amulet. If you try to regain access, you will see a message indicating that a sign on the door reads "No entry on pain of death. Sealed by authority of Commander Adamus Phillida, Imperial Legion".
Exterior[edit]
- The exterior is located at coordinates: Tamriel 11, 20
- This location's map marker (M on map) is named Imperial Prison Sewer (editor name ICPrisonSewerMapMarker). The entrance door is NE of the marker, 1 feet away.
- 1-2 Mud Crabs are near the entrance
- 1 Slaughterfish is near the entrance
- 1 Nirnroot is at location N on map
- The following plants can be found near the entrance: 3 Clouded Funnel Cap plants and 2 Green Stain Cup plants
Zone 1: Imperial Prison[edit]
After the game's introductory cinematic, you will be placed in a cell in the Imperial Prison, in the southwest corner of this zone. After you have chosen your race, three Blades (Captain Renault, Baurus, and Glenroy) will arrive, escorting Emperor Uriel Septim VII. After entering your cell and positioning you out of the way next to the window, Renault will open a secret passage in the northeastern wall of your cell and the group will proceed through it.
Follow them through the series of passages until you arrive in a large room. Four Mythic Dawn assassins will appear from door X (to the west), which is too high to reach, and attack the group, killing Renault before they are cut down. Baurus stoically takes charge and leads the Emperor and Glenroy through the nearby door X (to the east), which is locked, thus leaving you alone. Pick up Renault's katana, as a wall (D) nearby will crumble and two rats will emerge to attack you.
Pass through the rubble into the next room, kill another rat, and loot the chest close to the entrance. Proceed to the skeleton nearby (B) and relieve it of its items. An iron bow and a rough leather shield are also close at hand. Use your lockpicks to unlock the chest next to the skeleton, then loot the other containers nearby and proceed to door A. In front of it is a dead goblin shaman (E) who holds the key to the door along with more decent loot.
Occupants:
Treasure:
- 1 Barrel (contains 1 Club, 12 Iron Arrows, 1 Iron Dagger, and 2 Lockpicks)
- 1 Chest (contains 10 Gold and 1 Sapphire)
- 1 Chest (contains 6 Gold and 1 Rusty Iron War Axe)
- 1 Sack (contains Gold, Lockpicks, and Food - 3x15%)
- 1 Small Crate (contains 1 Club, 2 Lockpicks, and 4 Torches)
- The following armor will always be found: 1 Rough Leather Shield
- The following weapons will always be found: 1 Iron Bow
Doors and Gates:
- There are three doors in/out of this zone:
- 1 door (at X - western) leads to a inaccessible area where the Mythic Dawn assassins are initially placed
- 1 door (at X - eastern - locked, key required) leads to the zone Imperial Subterrane
- 1 door (at A, locked) leads to the zone Imperial Substructure
- 1 Iron Gate at C (locked, key required, opened by Baurus)
- 1 Crumbling Wall at D
Other
- 1 Goblin Shaman (dead) at location E on map
- 1 Skeleton (dead) at B
Zone 2: Imperial Substructure[edit]
This zone is fairly linear, so proceeding from door A to door B shouldn't be too difficult. The main obstacle in this zone is the zombie in the corridor linking the first two rooms. Several rats will flee its presence, and taking them down shouldn't be too challenging; as for the zombie, use your newly acquired fire damage spell to finish it off.
The third room contains a good deal of equipment and treasure at G, in particular heavy armor. Be sure not to miss the chest in the southern corner, which is hidden in a hole in the wall and has a decently challenging Average lock. In the final room, loot the skeleton at D and pick up the flawed ruby next to it, then harvest the nearby plants for ingredients useful for poisons.
Occupants:
Treasure:
- 1 Barrel (contains 4 Ales)
- 1 Chest (contains 6 Gold and 1 Rusty Iron War Axe)
- 1 Chest (contains 2 Lockpicks, 1 Potion of Respite, and 1 Potion of Sorcery)
- 1 Chest (contains 24 Iron Arrows, 1 Iron Bow, 1 Iron Cuirass, 1 Iron Greaves, 5 Lockpicks, 1 Potion of Healing, 1 Rusty Iron War Axe, and 3 Torches)
- 1 Chest (contains 20 Gold, 3 Lockpicks, and 2 Torches)
- 1 Chest (contains 2 Potions of Healing and 1 Potion of Sorcery)
- 1 Sack (contains 3 Lockpicks and 1 Potion of Healing)
- The following armor will always be found: 1 Rusty Iron Helmet and 1 Rusty Iron Shield
- The following ingredients will always be found: 3 Cheese Wedges, 1 Lettuce, and 1 Tomato
- The following weapons will always be found: 1 Iron Warhammer
- The following plants will always be found: 8 Cairn Bolete plants, 4 Stinkhorn plants, and 3 Wisp Stalk plants
- The other following items will always be found: 1 Flawed Ruby, 4 Gold, and 1 Silver Goblet
- Some of the above items are clustered at location G: 2 Cheese Wedges, 2 Gold, 1 Iron Warhammer, 1 Lettuce, 1 Rusty Iron Helmet, 1 Rusty Iron Shield, and 1 Tomato
Doors and Gates:
- There are two doors in/out of this zone:
- 1 door (at A) leads to the zone Imperial Prison
- 1 door (at B) leads to the zone Natural Caverns
Other
- 1 Skeleton (dead) at location D on map
Zone 3: Natural Caverns[edit]
Once again, this zone is quite straightforward, but the goblin enemies here are much more challenging than the previous rats. In the first room, pick up the novice mortar & pestle and the various ingredients, which enable you to produce some Damage Fatigue and Damage Health poisons that may be of use later on. The goblin skirmisher in the next room will set off the three Swinging Log traps (M) by crossing the Tripwire, so try to push him towards the incoming logs.
In the next passage, you can choose to finish the two goblins ahead by pushing the Falling Logs at L down at them, or you can try to run through the whole of the next large chamber, getting all the goblins to follow you, then return here and hopefully kill more enemies using the logs in one go. If you prefer not to take a risk, sneak and snipe the enemies in the large chamber to prevent the goblins from ganging up on you. In particular, beware of the goblin witch. Loot the area and proceed to the next zone through door C.
Occupants:
- 1 Goblin Witch at location A on map
- 5 Goblins
- 1 Goblin Berserker
- 1 Goblin Skirmisher
- 4 Rats (1 dead)
Treasure:
- 1 Barrel (contains 4 Ales)
- 1 Crate (contains 8 Rat Meat)
- 1 Chest (contains 1 Iron Longsword, 3 Lockpicks, and 1 Repair Hammer)
- 1 Chest (contains 3 Potions of Healing and 1 Potion of Respite)
- 1 Chest (contains 20 Gold, 3 Lockpicks, and 2 Torches)
- 3 Chests (contain 26-34 Iron Arrows and 2-3 Lockpicks)
- The following ingredients will always be found: 2 Apples, 1 Stinkhorn Cap, and 1 Wisp Stalk Cap
- The following potions will always be found: 1 Poison of Illness
- The following weapons will always be found: 1 Iron Dagger
- The following plants will always be found: 6 Cairn Bolete plants and 1 Stinkhorn plant
- The other following items will always be found: 1 Flax Tunic, 1 Gold, 1 Novice Mortar & Pestle, and 1 Sack Cloth Sandals
Traps:
- 3 Swinging Log traps at locations M on map (triggered by nearby Tripwire)
- 1 Falling Logs trap at L
Doors and Gates:
- There are two doors in/out of this zone:
- 1 door (at B) leads to the zone Imperial Substructure
- 1 door (at C) leads to the zone Imperial Subterrane
Zone 4: Imperial Subterrane[edit]
You enter this zone from door C in a cave-like tunnel which soon leads to a hole in the wall, allowing you to jump down into the main section of the zone. You will still be on a higher level than the Blades and the Emperor, who arrive from door X, and if you're quick enough, you can snipe at the Mythic Dawn assassin on the ledge opposite you. Jump down once the battle is over and follow the group once again. If you wish to keep all of the loot from the previous zones and are carrying it back and forth, make sure to throw it down below before you jump, as the distance is too high to jump back up.
In the next room, instead of following the group down into the lower area, you can take advantage of your elevated position and snipe at the assassins on the ledges in front of you. Continue through the zone, which shouldn't pose much of a problem if you leave the fighting to the Blades. Door D will require a key to open, so wait for the Blades and the Emperor to approach and unlock it. Note that once you pass through door D it will lock behind you and you won't be able to access this area again, so make sure to take all the loot you want with you.
Occupants:
Treasure:
- 1 Chest (contains 10 Iron Arrows and 4 Lockpicks)
- 1 Chest (contains 3 Potions of Healing and 1 Potion of Respite)
Doors and Gates:
- There are three doors in/out of this zone:
- 1 door (at X - locked, key required) leads to the zone Imperial Prison
- 1 door (at C) leads to the zone Natural Caverns
- 1 door (at D) leads to the zone The Sanctum
Zone 5: The Sanctum[edit]
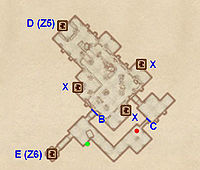
After entering from door D, Baurus will realize the gate at B is blocking the way, and will instead proceed towards the small room to the east. As soon as you reach it, four assassins will enter from the doors at X and a gate will appear in front of door D. After the Emperor has died and the secret wall at C has opened, the assassin will attack you. He is quite challenging, so if you are having problems, backtrack to Baurus and let him help. Baurus will then give you the key necessary to open door E and proceed to the Sewers.
Occupants:
Treasure:
- 1 Chest (contains 3 Potions of Healing and 1 Potion of Respite)
Doors and Gates:
- There are five doors in/out of this zone:
- 3 doors (at X) lead to 3 inaccessible areas where the Mythic Dawn assassins are initially placed
- 1 door (at D) leads to the zone Imperial Subterrane
- 1 door (at E) leads to the zone Sewers
- 1 Iron Gate at B (locked, key required)
- 1 Secret Wall at C
Zone 6: Sewers[edit]
Navigating this zone is quite simple. Proceed from door E down to the first room, where you will face up to three enemies (two goblins and a rat), so consider sneaking to pick them off one at a time. Continue until you reach the exit (Out), where you will be given a final opportunity to change your player character's attributes.
Occupants:
- 1 Goblin
- 1 Goblin Berserker
- 2 Rats
- 1 Sewer Rat
Treasure:
- 1 A Battered Crate (contains 3 Flour)
- 1 Barrel (contains 6 Cheese Wheels)
- 2 Chests (contain 26-34 Iron Arrows and 2-3 Lockpicks)
- The other following items will always be found: 1 Gold
Doors and Gates:
- There are three doors in/out of this zone:
- 1 door (at E) leads to the zone The Sanctum
- 1 door (at Out) leads outside


