Skyrim:Saarthal
|
|||
|---|---|---|---|
| # of Zones | 2 | ||
| Clearable | Yes | ||
| Dungeon | Yes | ||
| Respawn Time | Never (storage is safe) | ||
| Level | Min: 6 | ||
| Occupants | |||
| Draugr, Jyrik Gauldurson | |||
| Important Treasure | |||
| Gauldur Amulet Fragment Saarthal Amulet Staff of Jyrik Gauldurson |
|||
| Console Location Code(s) | |||
| SaarthalExterior, Saarthal01, Saarthal02 | |||
| Region | |||
| Winterhold | |||
| Special Features | |||
| Word Wall | Ice Form | ||
| # of Alchemy Labs | 1 | ||
| Ore Veins | |||
| # of Gold | 1 | ||
| # of Iron | 2 | ||
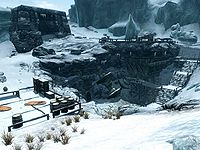
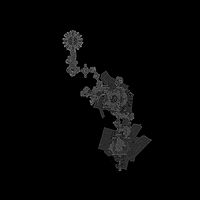
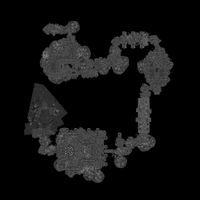
Saarthal is a medium-sized Nordic ruin southwest of Winterhold. It has two interior zones: Saarthal Excavation and Saarthal.
It was the first Nord settlement in Skyrim, and is therefore a site of great interest to the College of Winterhold, who is excavating the site in search of ancient artifacts. Unbeknownst to the college, Saarthal is also the location of the sealed tomb of Jyrik Gauldurson (part of the Forbidden Legend quest).
The history of Saarthal suggests that it may have some greater significance. The original settlement was attacked by elves in the Merethic Era, an event known as the Night of Tears. A book on the subject, Night of Tears, suggests that the attack was actually an attempt to gain control of some powerful item found under the city. The Imperial Report on Saarthal also concludes that the elven attack was focused on a specific objective.
The entrance to Saarthal is locked (key required) at the start of the game. It can only be entered once you have started the quest Under Saarthal, meaning that you must first join the College of Winterhold and complete its first quest, First Lessons.
Related Quests[edit]
- Dungeon Delving: Do a favor for Jarl Korir by retrieving the Helm of Winterhold. (radiant)
- Forbidden Legend: Investigate the forgotten Gauldur Legend.
- Under Saarthal: Uncover the mysteries beneath this ancient ruin.
Walkthrough[edit]
Exterior[edit]
There are series of wooden platforms and bridges with ramps leading down towards the entrance. There are many food barrels on the platforms, two sets of shelves holding several burial urns, and a table with an urn on top. Beside the shelves is an unlocked chest, and in front are two unowned bed rolls. At the top of the last ramp is a silver ore vein in the southwest corner of the excavation site.
Saarthal Excavation[edit]
- This article focuses on the dungeon of Saarthal, in particular detailing the locations of all items found in the dungeon. For more detailed information about the quest that takes place here, see Under Saarthal.
To gain entry, you must talk to Tolfdir, thus unlocking the main door. This provides you access to the first half of Saarthal Excavation, namely the two large chambers and connected passageways that have already been explored by the College of Winterhold. Each of the large chambers is several stories high, and dominated by ancient stone pillars. The College has built various rickety wooden ramps around the pillars, allowing you to descend into the rooms and access various sections.
In addition to various minor loot (harvested ingredients, mushrooms, leather strips) scattered throughout the area, there are a few more notable items. Next to the entrance to the first room, a bucket sitting next to a cart is hiding two orichalcum ingots. At the lowest level, on the ground against the eastern wall, there is an iron ore vein to the left of some wooden scaffolding located directly beneath an overhead bridge. If you need a pickaxe one can be found on the entry level platform, just before the first wooden pathway leading down into the excavation site. Another is on the ground level at the other side of the room from where the ore vein was found. A nearly inaccessible gate high in the northeast corner of the room prevents access to the shortcut exit from the end of the dungeon; the gate can only be opened using a handle accessible on the other side. Another iron ore vein is found on the east side of the tunnel leading to the second chamber.
The second room contains a few more valuable items. At the top-most level of the room, there is an adept-locked draugr chest. It is located due north of the entrance to the room, and requires jumping across a gap left by a collapsed bridge. On the north side of the room, at a middle level reached by a straight ramp from the room floor, there are two pieces of quicksilver ore and a refined malachite ingot (the latter hidden inside a bucket). Finally, the room also contains a gold ore vein, at the middle level of the south wall, next to the circular ramp leading to the room's exit. To the left, on a ledge at the same height as the gold ore vein, reached by jumping from the start of the ramp, around the corner from it is a bucket concealing another piece of quicksilver ore.
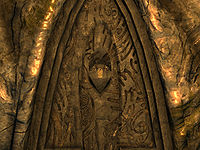
To move beyond the first section of the excavation, you must complete some objectives in the related quest, Under Saarthal. The quest page provides full information on all quest-related details. However, if you wish to simply progress as quickly as possible, the key required steps are:
- Find the Ancient Amulet, on a wall at the northernmost end of the accessible area, and take it (this can be done without going through any of the quest dialogue).
- Equip the amulet, now identified in your inventory as the Saarthal Amulet, and cast any targeted spell at the wall where you found the amulet. The wall will crumble.
- Go through the passage leading north behind the crumbled wall to the next room. Once both you and Tolfdir are in the next room, a ghostly figure identified as Nerien will appear with various dire warnings about the consequences of your actions.
- Talk to Tolfdir, going through his dialogue until he suggests searching the coffins.
Tolfdir's dialogue prompts the coffins in the room to burst open, releasing two leveled draugr, but also opening the passage forward. One of the two draugr is always a high-level magic-casting draugr, while the other is a standard leveled draugr specializing in one-handed melee combat. Before leaving this room, check the table in the middle of the room for a rare-type apothecary's satchel.
The passage north immediately leads to a closed gate, opened by a lever on the floor to the right. The circular room on the other side of the gate has ten vertical draugr coffins along the wall at your level, and many more coffins can be seen above and below, filling a vast cylindrical chamber. Luckily, only four of the coffins contain active draugr. Once you enter the room, the four leveled archer-type draugr will burst out to attack you and Tolfdir. Although there is no loot in the room, Tolfdir is fascinated by the coffins, and stays behind in this room to study them.
The door out of this room leads to the next zone, Saarthal proper. At first, some raised spears and a lowered gate prevent you from opening the door. However, the two pull chains (one on either side of the door) make these retract. The right-hand chain also simultaneously closes the gate behind you, so you will need to activate it a second time if you want to backtrack.
Occupants:
- 1 leveled Draugr (magic-caster; best possible level)
- 1 leveled Draugr (one-handed melee)
- 4 leveled Draugr (archers)
Treasure:
- 1 Chest (Draugr-type; adept locked)
- 1 Apothecary's Satchel (rare-type)
- Ingredients: 1 Blisterwort, 2 Bone Meal, 1 Scaly Pholiota
- Ores/Ingots: 1 Gold Ore Vein, 2 Iron Ore Veins, 2 Orichalcum Ingots, 3 Quicksilver Ores, 1 Refined Malachite
- Plants: 1 Blisterwort, 4 Hanging Moss, 9 Namira's Rot
- Potions: 1 Lingering Poison, 1 Potion of Strength
- Weapons: 4 Pickaxes
- Other: 5 Leather Strips, 1 Lesser Soul Gem
Saarthal[edit]
You start in an antechamber (with two large urns and one burial urn) that opens into the first large room of this zone. Three leveled melee draugr are waiting in their coffins, while a fourth leveled archer-type draugr is patrolling at the far end of the room and will come to help out when he hears combat. You also need to watch out for a fire rune trap (the first of several elemental rune traps in this zone), located at the first turn in the room. Once you clear the lower level of the room, you can climb the stairs to collect the room's loot. One chest (adept-difficulty lock) is located back near the entrance to the room, on the west side of the upper level. There is also a single burial urn located next to a bookshelf on the other side of the room, which can be seen from the locked chest. The urn can be accessed by either jumping across the gap in the wood floor directly to the south of the chest, or by walking along the perimeter of the room. The other loot is all near the exit at the southeast end of the room. A small shelving unit holds a medium coin purse, a ruby, one arrow, one leveled soul gem, a burial urn, and assorted clutter; another burial urn is found near the wall opposite the unit. A random dagger is lying inside the broken sarcophagus in front of the door. Finally, there is one unlocked chest by the door.
Opening the iron door leads to a corridor lined with burial niches. Three burial urns are immediately across from the door. Around the corner you will see a chest at the bottom of the next section of the passage, but before rushing to the chest, note the pressure plate on the floor, which triggers a volley of darts. Two leveled melee draugr are also waiting to ambush you from the wall niches after the chest. Two leveled restore (health, magicka, or stamina) potions are at the end of the next section before a turn to the east; one is in the large bowl in the nook with three candle holders, and the other is in the broken urn directly opposite. The potion in the urn may be difficult to access.
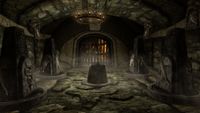
The hall then leads into the first of Saarthal's two puzzles. It is a typical pillar puzzle, where each pillar needs to be rotated until the symbol matches the symbol displayed on the wall behind the pillar. Once the pillars are set correctly, activating the lever opens the gate at the end of the room; if the pillars are not correct, the lever will instead trigger a dart trap. Along the north wall, the correct pillar images are (from west to east): Eagle—Snake—Whale. Along the south wall they are (again, from west to east): Whale—Eagle—Eagle. While setting the pillars, check the draugr corpses in the adjacent niches: four of the corpses can be looted for minor treasure.
Past the puzzle gate and down a set of stairs, an iron door opens into the next large room. Only one leveled draugr is on patrol at the upper level of this room: a rare female draugr, who is a two-handed melee fighter. Most of the loot (with the exception of one burial urn in the lower level) is also found in the upper level. The obvious containers in the upper level are two large urns and a burial urn. Less obvious are the two potions (one best-quality restore health and one best-quality restore magicka), both hidden in the broken urn at the northwest corner of the sarcophagus. Multiple other platforms in the room can be accessed using Whirlwind Sprint, but none of them contain anything.
The small chamber on the other side of the door contains several valuable items: an unlocked chest is flanked by a large urn on the left, and a broken urn holding a leveled sword on the right. As you push through the cobweb-filled doorway, watch out for the burial urn, lootable draugr corpse, and shock rune trap in the alcove, then a second shock rune trap as you enter the second puzzle room.
The second puzzle room contains four rotating pillars with symbols above them. The correct symbol for each pillar is shown on the wall behind the pillar (the middle section of the room also displays the correct set of symbols). The twist this time around is that activating one pillar may cause multiple pillars to rotate simultaneously. However, by observing which pillars control which other pillars, you can identify the correct order in which to set the pillars, such that once you have set a pillar, it is not altered by the subsequent pillars. The solution is:
- Southeast pillar (Whale)
- Northeast pillar (Snake)
- Southwest pillar (Eagle)
- Northwest pillar (Whale)
After confirming all four pillars are in the above positions, pull the lever to open the gate. If the pillars are not correct, you will trigger a dart trap.
Tolfdir will catch up with you as you explore the subsequent corridor, providing a clue that you are approaching the end of the dungeon. However, you are not yet in any danger: there is one more iron door between you and the boss enemy. So first make sure to collect the loot in the corridor, while avoiding the pressure plate trap (and the darts that fly down the corridor when Tolfdir inevitably stumbles over the trap). The alcove at the north end contains an alchemy lab, on top of which you can find a random book and a random restoration potion. One more random restoration potion is on the west side of the hallway, along with a leveled heavy helmet, a burial urn, and two lootable draugr corpses. An open sarcophagus at the south end contains a random soul gem, and another burial urn and a lootable draugr corpse are nearby.
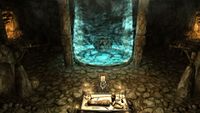
When you are ready, open the door to reveal a large room bathed in the blue-green light of a massive orb that floats, spinning, at the far end of the room. You won't have much time to admire the sight, however, because the dungeon's boss, Jyrik Gauldurson, is also located in this room. This is where the two quests taking place in Saarthal come together: the orb is part of the Under Saarthal quest, and Jyrik is part of the Forbidden Legend quest. In addition, you will need Tolfdir's help to fight Jyrik, since only Tolfdir can disable the connection between Jyrik and the orb that initially makes Jyrik invulnerable. For more details on how to defeat Jyrik, see his page. Once he is killed, Saarthal is marked as cleared.
Once you have dealt with Jyrik, make sure to loot his corpse to obtain a Gauldur Amulet Fragment with a +30 Fortify Magicka enchantment and a Writ of Sealing. Reading the writ triggers the start of the Forbidden Legend quest (if you had not previously started the quest). You will also want to talk to Tolfdir to receive your final objective for the Under Saarthal quest. You are then free to explore the room to find the rest of the available loot. The altar in the center of the room contains the most important items: the Staff of Jyrik Gauldurson, one leveled filled soul gem, and two leveled poisons, as well as a lootable draugr corpse and a burial urn. Elsewhere in the room you can find three large urns.
A door behind the orb leads to the final room of the dungeon: a fern-filled grotto that is a distinct change from the rest of the coffin-filled Nordic ruin. This room contains a word wall (with a word of the Ice Form shout), and the dungeon's boss chest. The exit from this room is the shortcut back to the first room of Saarthal Excavation. To open the final gate, you will need to activate a handle found on the east (left-hand) wall of the passage.
Occupants:
- 4 leveled Draugr (one-handed melee)
- 1 leveled Draugr (archer; patrolling)
- 2 leveled Draugr (two-handed melee)
- Jyrik Gauldurson (magic-casting Draugr; best possible level), carrying 1 Gauldur Amulet Fragment and 1 Writ of Sealing
Treasure:
- 1 Boss Chest (Draugr-type)
- 4 Chests (all Draugr-type; one locked with adept-difficulty lock)
- 8 large Urns
- 13 Burial Urns
- Armor: 1 random Heavy Armor Helmet; 1 Steel Shield
- Books: 1 random Book (from List 3)
- Ingredients: 1 Blisterwort, 1 Orange Dartwing
- Plants: 5 Blisterwort, 14 Hanging Moss
- Potions: 4 leveled restoration potions (equal chance of being Restore Health, Restore Magicka, or Restore Stamina potions; always best possible quality), 1 best-quality Restore Health potion, 1 best-quality Restore Magicka potion, 2 random poisons (one of which is always best possible quality)
- Soul Gems: 3 random soul gems (2 are always filled; 1 has a 25% chance of being filled)
- Weapons: 1 random arrow, 1 random Dagger, 1 random Sword, 1 Staff of Jyrik Gauldurson
- Other: 1 Coin Purse (medium size), 1 Gold, 1 Ruby
Other:
Bugs[edit]
- The pillars in the six-pillar puzzle may not move when activated.
- This can sometimes be fixed by exiting the area and then reentering, or by reloading a save from before entering the area.
On PC, you may also open the console and enter
disable 72434to disable the gate blocking your way, or simply usetclto walk directly through the gate.- In the final boss fight, conjuring a flame atronach may incinerate the Staff of Jyrik Gauldurson. To obtain the staff, re-load from an earlier save and re-run the boss fight with less fire damage.
Maps[edit]
- Skyrim-Places-Nordic Ruins
- Skyrim-Places
- Skyrim-Places-Level 6
- Skyrim-Places-Winterhold (region)
- Skyrim-Places-Gold Veins
- Skyrim-Places-Iron Veins
- Skyrim-Places-Alchemy Labs
- Skyrim-Places-Word Walls
- Skyrim-Places-Clearable
- Skyrim-Places-Safe
- Skyrim-Places-Discoverable
- Skyrim-Places-Draugr Crypts
- Skyrim-Confirmed Bugs
