Skyrim:A Night To Remember
|
Quick Walkthrough[edit]
- Meet Sam Guevenne and accept the drinking contest.
- Help clean up the Temple of Dibella.
- Ask about Sam and the staff in Rorikstead.
- Talk to Ysolda in Whiterun about the staff.
- Head to Morvunskar.
- Search Morvunskar for Sam and the staff.
- Receive your reward from the Daedric Lord Sanguine.
Detailed Walkthrough[edit]
Drinking Competition[edit]
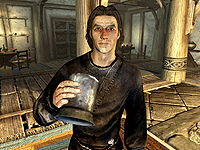
Once you reach level 14, you may meet Sam Guevenne in any inn or tavern. He will challenge you to a drinking contest, offering to award you a staff if you win. Sam reaches his limit after his second drink. You can win by taking a third drink, after which a drunken Sam declares you the winner. However, before awarding the staff, Sam wants to take his new drinking buddy to "a place where the wine flows like water". At this point your mental blackout begins and the screen fades to black until the next day.
The Hangover[edit]
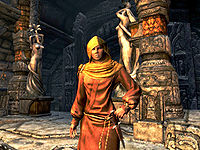
You will be woken by Senna, a priestess, in the temple of Dibella in Markarth. When you ask about what happened, she states you were blathering about a wedding and a goat, or blaspheming the statuaries by fondling. You apparently made quite a mess of the temple, so she asks you to clean up the temple and make amends.
| Option | Dialogue |
|---|---|
| Was a man named Sam with me? | Dibella teaches love and compassion, but that doesn't mean we're just going to tell you what you want to know and let you walk away from this. Pick up your mess, then apologize, and if we think you're sincere we'll consider lending you aid. |
| I'm sorry, I don't even remember how I got here. (Persuade) | Passed: Well, you were deep in your cups when you got here. You were ranting but most of it was slurred. You said something about Rorikstead. Failed: Oh, I'd love to help you figure it out, but I'm so busy cleaning up the mess you made of our temple... Now if you were to help tidy up and perhaps apologize afterwards... I might be able to help you. |
| Tell me how I got here and I'll pay for the damages. (Bribe) | Passed: Well, we can always use contributions. You were ranting when you got here but most of it was slurred. You did say something about Rorikstead . Maybe you should take a look there. Failed: Oh you must be nobility of some sort. Running around partying and paying others to clean it up. I don't think so. Clean up your own mess. |
If you apologize, you will learn a little bit more information about what happened. You will have to pick up several seemingly meaningless items, namely, a giant's toe, two bottles of Alto Wine, and a confusing note from Sam. According to the note, you need these items, now marked as quest items, and a Hagraven Feather to fix the staff you were promised. You can skip the cleanup through persuasion (Average, Speech Skill 50) or bribe. Note that the Shrine of Dibella in the same room will grant you a +10 Speechcraft blessing for 8 hours, which can potentially help you for all stages of this quest. If you avoid cleaning up, you need not worry about trying to get the items.
After you clean up the temple, the priestess tells you that when you got there you were saying something about Rorikstead.
Grok and a Goat[edit]
Head on to Rorikstead and when you arrive, look for Ennis. He will indignantly rebuke you for stealing his prized goat, named Gleda, and selling her to a giant. To get the information you need about Sam and the staff, you can pay Ennis 1000 gold for the goat, persuade him, intimidate him, or simply retrieve his goat.
| Option | Dialogue |
|---|---|
| What happened with Gleda again? I'm a little fuzzy on that. | You really don't remember stealing a goat and selling her to a Giant? Are you thick? Go get her! At least she's bound to follow you back - you smell just like the fermented feed she likes. |
| Did I say anything about where I left a staff? | You mentioned something like that... when you were running off with my goat! Tell you what - you bring back my goat, and maybe I'll give a damn about your staff. |
| Help me retrace my steps and I'll pay you for the goat. (1000 gold) | Passed: Fine, but I'll still be missing my Gleda. Doubt I'll ever have a prize winning goat again. Most of what you said was gibberish but you left a note. The only bit I could read was "after repaying Ysolda in Whiterun." Failed: There's not enough money in the world to replace Gleda. |
| Tell me everything and you won't end up like your goat. (Intimidate) | Passed: Okay, okay. Most of what you said didn't make sense but you left a note. The only bit that I could read said "after repaying Ysolda in Whiterun." That's all I know. Failed: Do what you have to do, I'm not giving up on Gleda. |
| I need to find Sam and the staff, in order to get Gleda back. (Persuade) | Passed: I suppose that makes sense. You didn't mention a Sam and nothing you said about the staff made sense. You left a note but it was mostly gibberish, the only bit I could make out was "after repaying Ysolda in Whiterun." Failed: You didn't seem to need either to sell Gleda to the Giant in the first place. I think you'll figure it out. |
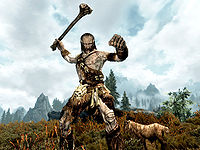
To get Gleda, head south to find the goat wandering around near a giant named Grok. The giant is non-hostile, but once you get the goat to follow you, Grok will decide to attack. It is possible to steal Gleda without incurring Grok's wrath if you sneak up and "talk" to Gleda and then immediately run before Grok notices you, or yield to Grok if he does attack you. Gleda will follow you no matter how fast you run. Another option is to cast Calm on Grok before engaging with Gleda. Grok will not care that you have taken Gleda for the duration of the spell. If you are skilled enough, you can kill Grok.
Lead the goat back to Ennis to learn that you mentioned something about paying Ysolda in Whiterun for a wedding ring.
The Blushing Bride[edit]
Go to Whiterun and find Ysolda. She says that you bought a wedding ring on credit from her, but since there isn't going to be a wedding, she wants the ring back. Your options are much the same as earlier conversations: you can persuade or intimidate her to get the information about Sam, pay her 2000 gold for the ring, or find the ring.
| Option | Dialogue |
|---|---|
| Seriously, let me pay you for the ring. (2000 gold) | Passed: Decided to go through with it then? I knew you couldn't have forgotten about your fiance [sic]. You spoke of her so glowingly. I don't know much about Morvunskar but it sounded like a lovely place for the ceremony. Congratulations. Failed: I think I would prefer my ring back. I put a lot of time into making it and you just gave is [sic] away as a joke. |
| I just need to get to the wedding. Please. (Persuade) | Passed: You must have had a wild night if you can't remember that. But I suppose everyone gets the jitters before their wedding. And I did say you could take a bit of time paying me back. You said the ceremony was going to be at Morvunskar. Don't forget you still owe me! Failed: I'm sure your bride-to-be will tell you when you [sic] where the ceremony will be. If she still wants to marry you when you tell her you can't afford the ring. |
| I don't care about the ring! Tell me what else I said! (Intimidate) | Passed: All right, all right. You're mean when you're sober. You said you [sic] the ceremony was going to be in Morvunskar. You said your friend Sam was going to be your best man. Failed: You think you can bully me. I grew up with five brothers. Go... get...my...ring. |
| What was that story about my fiancee [sic]? | How could you forget? It was the sweetest story I'd ever heard. You met at the full moon, under the biggest tree in Witchmist Grove, surrounded by fireflies. It was straight out of a storybook. |
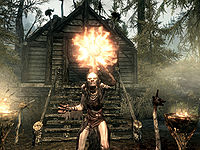
If you choose to get the ring, find your "fiancée", Moira the hagraven, who awaits you at her hut in Witchmist Grove:
"Darling! I've been waiting for you to return, to consummate our love!"
Your only option is to ask for the ring back. Moira gets mad and turns hostile:
"What? You want it for that hussy Esmerelda, with the dark feathers – don't you? I won't let her have you!"
Kill her and take the wedding ring from her inventory.
Once you have the ring, return to Whiterun and give it to Ysolda to learn where you were going to have the ceremony: Morvunskar.
The "Perfect" Wedding Location[edit]
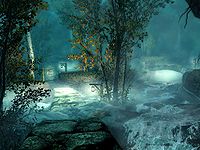
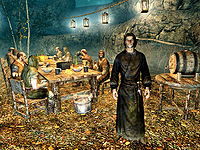
Having learned of the wedding's location, head over to Morvunskar. You will find a lot of hostile mages both outside and inside there. Fight your way into the fort. Eventually, after descending one, then ascending another stairway, a ball of blue light will appear. Enter the light and you will be transported to Misty Grove. Follow the path and you will find a party already in full swing, including your drinking buddy Sam. Sam will eventually reveal that he is actually the Daedric Prince of Debauchery, Sanguine. He will tell you that he was introducing some merriment and subversion into the world and was encouraging you to go out and "have fun". The items he had you bring to repair the staff, it turns out, are pointless, and will no longer be quest items. Sanguine will reward your efforts to track him down with the Sanguine Rose and will teleport you back to the pub where you met him.
Notes[edit]
- Patch 1.5 sets Senna, Ennis, and Ysolda as essential. Although the patch notes the change as essential "until [their] part in A Night To Remember is completed", they are simply set as essential for the entirety of the game.
- After the quest is completed, you may have a random encounter with an Argonian called Deep-In-His-Cups who, according to him, was a part of the debauchery with you and Sam. He states that you and Sam owe him 10,000 gold for a bet because he ran into a bandit camp and almost died. If you say that you don't have 10,000 gold, he will attack you unless you pass an easy Speech check. If you pass the speech check, he will lower your debt to 750 coins. If you pay the debt (either 10,000 or 750 coins), he will go back to Black Marsh.
- Sam can spawn at any of the inns across Skyrim, including those in towns, not just the ones in hold capitals.
- All of the items in Sam's note are indirectly related to the quest: the giant's toe is a reference to Grok, holy water is a reference to Dibella Shrine's well, and a Hagraven feather is a reference to Moira.
- Even if you never picked up Sam’s note (for instance, by using persuasion or payment at the temple of Dibella) and thus never learned about the items supposedly necessary to repair the staff, dialogue options with Sanguine will still refer to you bringing along those items.
- Teleporting to the temple will not count as "discovering" Markarth; if you have not been to Markarth before and fast travel away immediately upon exiting the temple, you will not be able to fast travel back. Instead, you may want to head to the city gates, which will initiate discovering the city.
- When Sanguine teleports you back to the inn after the quest, the map marker will still be pointing at Morvunskar.
- In the temple of Dibella, if you open the overview map, you will be shown the location of where you drank, and not Markarth.
- If you have already cleared Morvunskar before starting the quest, enemies will respawn in its exterior cell, but the fort's interiors will stay empty. Loot will also not respawn.
- Neither Ysolda's, nor Senna's dialogue will change if you are married to them. Regardless of where she may be currently living, Senna will still be at the temple of Dibella when you wake up. Ysolda will retain her location if moved somewhere other than Whiterun, and you will need to speak toher there.
- Many pieces of cut content related to this quest can still be found in the files:
- The "Holy Water" mentioned in Sam's list, actually exists as an unused item. Despite its mention in the note, generic Alto Wine appears in its stead.
- Grok the giant was meant to have a line of unique attack dialogue, but as Giants can't talk in the final game, it goes unused: "You cannot eat Gleda! Gleda is protected by Grok!"
- An NPC called Drunk Cultist was meant to be part of this quest, and she is still placed in Morvunskar, near the base of the portal to Misty Grove, but her ref is never activated. Since she doesn't have any dialogue leftover, it's unknown what purpose she would've served.
- There is dialogue present in three different voice types which was meant for (apparent) bandits that you would've encountered in another random encounter after completion of the quest. The bandits would've been familiar with you, and it seems that you and Sam wronged them in some way, as they would apparently attack after saying the following lines: "Once you leave the party you can't just come back.", "Lets see how tough you are without Sam keeping an eye on you.", "No Sam, no protection. Time to die."
Bugs[edit]
- If you return to Misty Grove after the quest you will be permanently stuck there.
- The Official Skyrim Patch, version 1.4, fixes this bug.
- Reload a save from before you entered.
- It is possible that you will not blackout after the third drink. The reason for this is that one of the characters essential for the quest has died.
- The Official Skyrim Patch, version 1.5, addresses this issue. Senna, Ennis, and Ysolda are now marked essential and thus unkillable.
You can use the console to advance the quest using the
setstagecommand. You will need to resurrect the dead NPCs first (all three must be alive to start the quest). To resurrect an NPC typeprid refIDinto the console, followed byenable,resurrect 1, andmoveto player(the refIDs are263CD(Senna),1CB2B(Ennis),1A69A(Ysolda)).
- The miscellaneous quest prompt to start A Night To Remember refers to Sam Guevenne as Sam Guenvere.
The Unofficial Skyrim Patch, version 1.3.3, fixes this bug.
- After completion of this quest, you may find Sanguine roaming around the fort Morvunskar, killing every mage he can find. Since he is essential, he will always win.
The Unofficial Skyrim Patch, version 2.0, fixes this bug.
- If you persuade or bribe the priestess, then pick up all the trash anyway, the objective to apologize to her will appear, and she will become a quest target, but you can't apologize.
The Unofficial Skyrim Patch, version 2.0.1, fixes this bug.
- You can skip/fix this by leaving the temple, going to Whiterun and talking to Ysolda about the ring.
- You also can apologize after you kill Moira and loot her corpse.
- Sometimes the trash in the Temple of Dibella or Moira won't appear.
- Try exiting the Temple to Markarth, then reentering the Temple.
- Sometimes Sanguine might not appear at all.
- It is possible that when talking to Senna that the dialogue may crash thus not allowing to ask about Sam and preventing any further progress in the quest.
- This bug can be worked around by talking to Ennis in Rorikstead.
- In PS4, saving immediately upon arrival to the temple and then loading the save, also fixes the problem, allowing you to talk to Senna.
- If you enter Misty Grove as a werewolf, Sanguine will be hostile. ?
Quest Stages[edit]
| Participate in a drinking contest with Sam Guenvere [sic] (DA14Start) | ||
|---|---|---|
| Stage | Finishes Quest | Journal Entry |
| 20 |
Objective 20: Participate in a drinking contest with Sam Guenvere [sic]
|
|
| 70 | ||
| A Night To Remember (DA14) | ||
| 5 | I have awoken in the Temple Of Dibella in Markarth. Sam and the staff he promised me have disappeared. | |
| 10 | I have awoken in the Temple Of Dibella in Markarth. Sam and the staff he promised me have disappeared. I have no idea how I got here but a priestess has told me I trashed the Temple. The priestess might tell me what happened to Sam and the staff if I pick up the place.
Objective 10: Find Sam Guevenne
Objective 12: Find the Staff
|
|
| 20 |
Objective 20: Help clean up the Temple of Dibella
|
|
| 30 | I have awoken in the Temple Of Dibella in Markarth. Sam and the staff he promised me have disappeared. I have no idea how I got here but a priestess has told me I trashed the Temple. I have cleaned up the Temple, if I apologize to the priestess she might tell me what happened to Sam and the staff.
Objective 30: Apologize to the priestesses of Dibella
|
|
| 40 | I have awoken from a night of debauchery with no idea what happened. Sam and the staff he promised me have disappeared. The priestesses of Dibella have told me to ask about Sam in Rorikstead.
Objective 40: Ask about Sam and the staff in Rorikstead
|
|
| 50 | I have awoken from a night of debauchery with no idea what happened. Sam and the staff he promised me have disappeared. Ennis in Rorikstead will tell me more about what happened once I return the goat I stole from him.
Objective 50: Find Gleda the Goat
|
|
| 75 | I have awoken from a night of debauchery with no idea what happened. Sam and the staff he promised me have disappeared. Ennis in Rorikstead will tell me more about what happened once I return the goat I stole from him.
Objective 75: Bring Gleda the Goat back to Ennis in Rorikstead
|
|
| 85 | I have awoken from a night of debauchery with no idea what happened. Sam and the staff he promised me have disappeared. A note of debt I gave to Ennis in Rorikstead has directed me to Ysolda in Whiterun, she might be able to direct me to Sam.
Objective 85: Talk to Ysolda in Whiterun about the staff
|
|
| 100 | I have awoken from a night of debauchery with no idea what happened. Sam and the staff he promised me have disappeared. Ysolda in Whiterun will give me more information about Same [sic] once I return the ring I borrowed from her to give to someone in Witchmist Grove.
Objective 100: Find the wedding ring in Witchmist Grove
|
|
| 115 | I have awoken from a night of debauchery with no idea what happened. Sam and the staff he promised me have disappeared. Ysolda in Whiterun will give me more information about Same [sic] once I return the ring I borrowed from her to give to a hagraven Witchmist Grove.
Objective 115: Take the wedding ring
|
|
| 125 |
Objective 125: Return the wedding ring to Ysolda in Whiterun
|
|
| 135 | I have awoken from a night of debauchery with no idea what happened. Sam and the staff he promised me have disappeared. Ysolda in Whiterun has told me to look for Sam in Morvunskar.
Objective 135: Head to Morvunskar
|
|
| 150 |
Objective 150: Search Morvunskar for Sam and the Staff
|
|
| 200 | "Sam" turned out to be the daedric prince of debauchery, Sanguine. He spurred me on during a drunken night of revelry that crossed all of Skyrim. I've acquired the Sanguine Rose for my troubles. | |
- The following empty quest stages were omitted from the table:
- DA14Start: 10, 30, 40, 50, 60.
- DA14: 0, 84, 110, 130, 165, 175, 185.
- Any text displayed in angle brackets (e.g.,
<Alias=LocationHold>) is dynamically set by the Radiant Quest system, and will be filled in with the appropriate word(s) when seen in game. - Not all Journal Entries may appear in your journal; which entries appear and which entries do not depends on the manner in which the quest is done.
- Stages are not always in order of progress. This is usually the case with quests that have multiple possible outcomes or quests where certain tasks may be done in any order. Some stages may therefore repeat objectives seen in other stages.
- If an entry is marked as "Finishes Quest" it means the quest disappears from the Active Quest list, but you may still receive new entries for that quest.
- On the PC, it is possible to use the console to advance through the quest by entering
setstage DA14 stage, wherestageis the number of the stage you wish to complete. It is not possible to un-complete (i.e. go back) quest stages, but it is possible to clear all stages of the quest usingresetquest DA14.

