Skyrim:Valthume
|
|||
|---|---|---|---|
| # of Zones | 3 | ||
| Clearable | Yes | ||
| Dungeon | Yes | ||
| Respawn Time | Never (storage is safe) | ||
| Level | Min: 24 | ||
| Occupants | |||
| Draugr, Frostbite Spiders, Skeevers, Hevnoraak, Valdar | |||
| Important Treasure | |||
| Hevnoraak Hevnoraak's Staff Withershins |
|||
| Console Location Code(s) | |||
| ValthumeExterior01, Valthume00, Valthume01, Valthume02 | |||
| Region | |||
| The Reach | |||
| Location | |||
| East of Arkngthamz West of Cradle Stone Tower |
|||
| Special Features | |||
| Word Wall | Aura Whisper | ||
| # of Alchemy Labs | 1 | ||

Valthume is a large Nordic ruin east of Arkngthamz and west of Cradle Stone Tower containing draugr, frostbite spiders, and skeevers. It contains three zones: Valthume Vestibule, Valthume, and Valthume Catacombs.

Related Quests[edit]
- Alteration Ritual Spell: Acquire Kahvozein's Fang and use it to get heartscales from a dragon for Tolfdir. (radiant)
- Evil in Waiting: Seal away an ancient evil.
- The Words of Power: Follow the Greybeards' advice to learn a Word of Power from a word wall. (radiant)
Walkthrough[edit]
Valthume Vestibule[edit]
Upon entering, a ghostly figure named Valdar immediately greets you and explains that evil is lurking in this barrow, asking you to help him (see the relevant quest for details). There is a throne bathed in natural sunlight from a grating above, with Valdar's skeleton still sitting where he has been keeping vigil. Next to the throne is an ancient Nord helmet. Once you have agreed to help, Valdar will instruct you on what is required, and will lower a hidden door at the rear of the room. The hidden door reveals a tunnel strewn with thin cobwebs leading to an ornate double door that opens into Valthume itself.
Valthume[edit]
The area is filled with urns, burial urns, other containers holding minor loot, and empty coffins.
The first room you enter is huge, with a sarcophagus in the center of the room with a stone carving at each corner, various stone pillars supporting the massive ceiling, and lit braziers providing light. Beyond the sarcophagus, at the rear of the room is a throne on a raised platform. Behind the throne to the left is a caved-in area with a dead draugr, and to the right is a doorway that leads into a narrow corridor with a burial urn at the end and a pressure plate near the start that triggers a battering ram in the next corridor. This trap can be used to kill or injure the first living draugr standing in this corridor. The corridor heading south opens into a small room with a second draugr. Along the west wall of this room are two urns near the entrance, a couple sideboards with a bowl of bone meal on the left sideboard, and a stone table between the sideboards with a burial urn and a draugr on top. Against the south wall is a set of shelves holding two bowls of troll fat, two skeever tails, and two bowls of bone meal, with a sack of food beside it. There are two exits from this room: one to the left of the shelves to the south, and the other in the southeast corner heading east. There is also a doorway in the northeastern corner, but that has caved in; however, you can peer through a gap in the rubble and see deeper into the barrow.
The doorway to the south descends a flight of stairs to a wooden door, but this is unfortunately barred from the other side. Through the doorway heading east, descend a flight of stairs to a balcony above a room, with another balcony opposite where a ghostly figure drifts away out of sight. Before descending the stairs, there are two imp stool fungi and an apothecary's satchel among the rubble on your left, and a sideboard with two burial urns ahead. Wooden stairs lead down from the balcony you are on. It is also possible to jump from the balcony to wooden planking along the north wall, then at the end either jump via the small ledge in the corner or use the Whirlwind Sprint shout to reach the other balcony where the ghostly figure was. Behind this second balcony is a short corridor that leads to a random shield and an unlocked chest. The room's lower level features several rows of benches facing an altar, with a throne on either side in the corners. Beware a trapdoor in the floor before the benches. Descending the stairs and approaching the altar will cause the two draugr sitting in the thrones to rise and attack; the one on the left is leveled. On the altar is a dead draugr, and in front of it is an unlocked chest. There are three exits from this room: one through the trapdoor into the room below, and doorways to the north and south. The northern doorway leads to the return route from beneath the trapdoor, while the doorway to the south leads farther into the barrow.
The room beneath the trapdoor holds an iron sword, a banded iron shield, and a bottle of poison. An iron door opens into a frostbite spider lair containing up to four frostbite spiders and an egg sac that can be harvested for a spider egg. Just on the other side of the iron door and slightly to the right, a gold diamond ring lies on the floor by the hand of a skeleton. The ring is not always easily visible, so scan the floor carefully. To the northeast, just past a pair of unharvestable egg sacs, is a draugr standing slumbering against the wall, hidden behind webbing; it will be carrying the Valthume Cellar key, and will be a magic user. Opposite where it is standing is an iron door with an expert-level lock, which is opened using the draugr's key. Behind the door is a wooden spiral staircase leading up, with two growths of bleeding crown fungi at the bottom. At the top of the stairs is the room to the north of the room with the trapdoor. This room contains a couple sets of shelves, one of which holds two burial urns and a plate with two amethysts and a flawless emerald. Beside the shelves, on the floor is a stone bowl holding two spider eggs.
The corridor heading south from the room with the benches and altar has a row of oil lanterns hanging from the ceiling. There is a doorway into a room partway along the corridor. This room also has several oil lanterns hanging from the ceiling, and contains a stone table against the north wall, with a woodcutter's axe and an iron mace on top and a knapsack underneath. A broken table to the west holds a leather strip, with an open door to the left of it leading to another small room. In this room is a stone table and bench opposite the entrance holding a copy of the Restoration skill book Withershins, and a sideboard holding three potatoes and a leather strip to the left. In the main room, against the south wall is a sideboard holding a leather strip, two sheaves of wheat, and a snow bear pelt, with a set of shelves to the left holding another snow bear pelt, a bear pelt, and a wolf pelt.
The corridor continues past the room and ends at an unlocked iron door. Behind the door is a room with more oil lanterns above and an oil slick on the floor. There are two skeevers and a draugr in this room; setting fire to the oil slick should take care of them. When you enter the room, you should see the ghostly figure through a window to the south. There are three pressure plates in the room that trigger some feeble poison dart traps, which don't seem to fire more than one or two darts each. At the end of the room is a gated corridor to the west and a concealed door to the east; the handle to open the concealed door is to the left of the door. This reveals a tunnel that leads to a naturally lit room, with an upright sarcophagus opposite and the first of the required opaque vessels on a pedestal to the left. The sarcophagus will burst open to reveal a leveled draugr. In the northeast corner is a growth of blisterwort fungi, a half-buried unlootable skeleton, an iron dagger, and a silver ruby ring. Returning to the previous room, you will find that taking the opaque vessel has raised the gate to the west, allowing further exploration.
After a few paces, the corridor turns to the south and opens into a larger corridor with roots crisscrossing the floor. Upon reaching a carved face that has fallen to the floor, the corridor staggers to the left and opens into a large room. You enter the room on a balcony area, with a couple stone tables in front of you. The tables hold three potions of regeneration, two bunches of tundra cotton, a baked potato, and several wheels of cheese. A bridge behind the tables leads across to another small area, with a magic-using draugr guarding an adept-locked iron door, and a ramp descending to the right to the room's lower level.
The adept-locked door opens into a large room with a sideboard holding a bulb of garlic next to an unlocked chest against the west wall. In the southwestern corner is a bookcase holding eleven common books, a random potion of stamina, a random potion of strength, and a sliced cheese. There is a throne in the middle of the south wall, with a table in front of it holding two potions of regeneration, a random potion of magicka, a random potion of health, and another random potion of strength. An urn is in the southeast corner. Finally, a second bookcase at the eastern end of the room holds a flute, a drum, a bowl of bone meal, eight more common books on and around it, and another potion of health on the floor in front of it.
In the previous room's lower level are two more draugr; the first is leveled, and patrols between the bottom of the ramp and the other end of the room. There are several skeletons either shackled to the walls or lying broken beneath them around this lower level; however, none are lootable. In the southeastern corner of the room on a raised section is another draugr standing next to a stone table, with a lootable skeleton on the table and various torture equipment around. An urn and two burial urns are in the northwestern corner. There is an exit to the east, and another to the north behind another raised section.
The room to the north has a couple sets of shelves holding six burial urns and some cheese, with an urn to the left of the shelves, and a concealed door to the east; the handle to open the door is to its left. The tunnel beyond the concealed door twists and turns until it reaches a room with a stone table holding a dead draugr in the center, an alchemy lab on your immediate left, and a sideboard to the right of the alchemy lab holding a sword, a burial urn, and three random potions: one healing, one magicka, and one stamina. Above the sideboard is a rack holding a garlic braid, two bunches of dried elves ear, and a bunch of dried frost mirriam. Two other garlic braids hang from a second rack in the middle of the room. Against the west wall is a sideboard holding an unlocked chest. To the north is a window looking into the previous room with the two skeevers. Back in the main chamber, the door to the east leads to Valthume Catacombs.
Valthume Catacombs[edit]
Entering the catacombs leads directly onto stairs descending to the north. At the bottom, the corridor turns east, then opens into a room with two burial urns and an apprentice-level trapped chest ahead; the trap opens a trapdoor in the ceiling, releasing a giant frostbite spider from above. There are two smaller additional frostbite spiders in alcoves to the sides of the room, and stairs on either side of the chest leading down to the floor. Underneath the chest, behind thick webbing that has to be cut or burnt though, is a lootable skeleton, and opposite at the bottom of more ascending stairs between two statues is an altar holding another lootable skeleton. There are two egg sacs that can be harvested in this room, one in the southwest corner, and the other at the top of the stairs in the northeast corner. At the top of the stairs is a gated doorway in the middle of the east wall, with the chain to open it on the right.
As you enter the catacombs proper, there is a draugr standing slumbering in an alcove in front of you. The path turns to the north, then back to the east. Take care, as there is a draugr patrolling up and down this corridor, and a pressure plate at this end triggers a swinging blade trap ahead. After the trapped section, the path turns south, then east again, and enters a brightly lit room with two urns and an altar holding another dead draugr. The path continues to the south, with another slumbering draugr in an alcove at the far end. Here the path turns to the west, with an urn to the left and yet another draugr ahead, then turns north, where another draugr is in an alcove on your left. To the west is a gated doorway opened by a chain in an alcove on the right wall, between stacks of coffins. There is also a narrow corridor to the south.
Beyond the gated doorway is a room guarded by a leveled draugr containing numerous sarcophagi, all of which are inactive, the second opaque vessel on a pedestal, and a row of three spellcaster traps. The traps only shoot through the windows into the next corridor, so you are safe to remove the soul gems from this side. This makes the next corridor much simpler and safer. Backtracking and taking the corridor to the south, the passage turns to the west after a few feet, then enters a corridor with a lootable skeleton on the ground and three windows into the previous room, where the spellcaster traps would have shot flames at you. At the far end is a doorway to the south entering a room, where the path turns east and descends past rows of alcoves for the dead. Two urns and eight burial urns can be found near the next corner, where the passage turns back to the south, with an altar ahead holding a bow and a dead draugr. To the west are two draugr wandering and two slumbering in alcoves, one along the north wall, and the other at the far end along the west wall; several of the draugr are leveled. In the southern half of the room is a pressure plate that triggers a spike wall that is hinged on the left. At the far end is another gated doorway in the southwestern corner, with the chain to open it on the west wall.
Through the doorway, there are sets of shelves on either side of you, but the only items of interest are a canis root sample on the top shelf to the right, an urn, and four burial urns. Wooden walls separate the raised central corridor ahead from the sides of the room, with five burial urns along the corridor, a small gap to the east by stairs leading down to the lower level, and another gap farther along to the east by a bridge to an outer balcony housing an unlocked chest and a dead draugr in an open sarcophagus. The balcony and the floor below have many sarcophagi, but only a few contain slumbering draugr that will burst out. There is also one draugr patrolling the eastern balcony. After looting three urns and two dead draugr on the lower level, head west into a rubble- and root-choked corridor. After a few paces, the corridor staggers to the left and ends at an iron door.

Beyond the door is a corridor guarded by three frostbite spiders and containing the iron dragon claw. Take care, as removing the claw from the pedestal will trigger the four flamethrower Statues around it. At the far end of the room is the puzzle door, the solution to which is written on the underside of the claw: Dragon—Hawk—Wolf. Past the door are stairs leading up to a doorway, which opens into another room with a total of six urns and four draugr; several of the draugr may be deathlords, so be prepared for a tough battle. In the center of this room is the third pedestal holding the last of the opaque vessels, behind which is a row of spears blocking access to the word wall and boss chest. If you have been sent here to retrieve a quest item, it will be in this chest. Taking the third vessel should lower the spears; if not, see notes or bugs. The word wall teaches part of the Aura Whisper shout. To the north of the word wall is a path to a gated doorway, opened by the chain on the north wall. Follow the corridor beyond this doorway, passing through an iron door to the first zone, and continuing until you reach the barred door you found early in the barrow; you can now raise the bar to provide a shortcut back to near the entrance.
At the end of the related quest, Hevnoraak will burst from the sarcophagus in the center of the large room at the start of Valthume. Don't forget to loot his ash pile for his mask and unique staff.
Notes[edit]
- You can get the word without raising the gate by standing by the wall to the right of the word wall (the side with the door to the next chamber) and pressing yourself as close to the wall as possible. The word will go through the wall to you.
- If you have picked up all three vessels and the bars have not retracted, stand on the podium for a few seconds then jump off, and the bars will retract.
- As you approach the area around Valthume, you will experience short, strong earthquakes. The quakes are unrelated to Valthume, as can be discovered by traversing the nearby Dwemer ruin of ArkngthamzDG. In your search for the Aetherium Forge during the quest Lost to the Ages, you will discover the quakes are echoes of a vast subterranean network of Aetherium foundries within the massive caverns under the mountains of southern Skyrim, and of the Tonal Architecture weaved by the ancient Dwemer to guard and house them.
- Valthume also appears in ESO.
Bugs[edit]
- If the puzzle door does not work, check here for possible fixes.
- It is possible for the quest vial to be knocked off the pedestal during the fight. This may cause some complications:
- It may be blown away to where you can't find it. You can try jumping on the pedestal or placing an item on it, and the bars may retract.
- It may press the switch twice. If you are outside the gate, you can jump on the pedestal, and your weight may cause the bars to retract. If you are inside the gate, you can try using a shout such as Unrelenting Force or Fire Breath on the pedestal.
- Reloading the autosave from when you entered the Catacombs, then exiting, re-entering, and making your way back to the door will correct this.
Maps[edit]
-
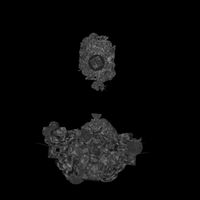
Valthume Vestibule
-
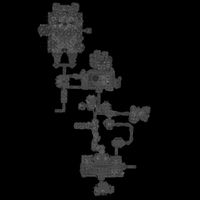
Valthume
-
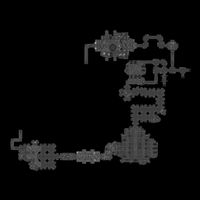
Valthume Catacombs


