Skyrim:Forsaken Cave
|
|||
|---|---|---|---|
| # of Zones | 2 | ||
| Clearable | Yes | ||
| Dungeon | Yes | ||
| Respawn Time | 10 days or 30 days | ||
| Level | Min: 6 | ||
| Occupants | |||
| Draugr, Ice Wraith | |||
| Important Treasure | |||
| Cracked White Phial A Game at Dinner The Mirror |
|||
| Console Location Code(s) | |||
| ForsakenCaveExterior, ForsakenCave01, ForsakenCave02 | |||
| Region | |||
| The Pale | |||
| Special Features | |||
| Word Wall | Marked for Death | ||
| # of Alchemy Labs | 1 | ||

Forsaken Cave is a medium-sized cave located west of Windhelm which is inhabited by icewraiths and leveled draugrs. The cave contains two interior zones: Forsaken Cave and Forsaken Crypt.
You can find the cave by following River Yorgrim westward from Windhelm, staying on the north shore.
Related Quests[edit]
- Dungeon Delving: Do a favor by retrieving an item from a cave. (radiant)
- Salty Sea-Dogs: Find some void salts for an inexperienced sea captain. (radiant)
- The White Phial: Retrieve a legendary artifact to fulfill an old alchemist's wish in Windhelm.
Walkthrough[edit]
Exterior[edit]
There is a leveled creature guarding the entrance, which is flanked by three burial urns and a patch of bleeding crown. There is also an iron ore vein a few feet away to the southwest.
Forsaken Cave[edit]

Upon entering, you will see an unlocked chest in a cart in front of you, and a lootable skeleton lying beside it with a random sword and a satchel next to it. Continuing on, you will find yourself in an ice tunnel which turns and descends to the northeast. At the bottom, the tunnel opens into a cavern where two leveled animals roam around. There are numerous large urns and burial urns found throughout these ruins. Opposite where you enter is a concealed door flanked by wooden walls. Behind the walls are a total of four burial urns. This door is your shortcut exit from the end of the dungeon, and cannot be opened from this side. If you return to these ruins after they have respawned, you will find this door still open.
To the west you will find an iron door flanked by two flights of stairs that lead to raised areas that contain nothing of interest. Through the door is a short corridor that leads to a stairwell with a wooden spiral staircase down. At the bottom is a corridor heading north, which after a couple turns opens into a wide corridor that has had a cave-in to your left and continues to the east. Partway along the corridor is a pressure plate that activates a poison dart trap from a statue in front of you. At the foot of the statue is an unlocked chest, while around the next corner a draugr waits.
The corridor staggers to the right, then continues to the east. At the end of this section is another draugr and a cave-in, with a narrow corridor on your left. This leads to a catacomb area with two alcoves ahead on the right. The first alcove contains a burial urn flanked by an ancient Nord helmet and a pair of boots. The second alcove holds only a burial urn. The path turns to the west and descends two short flights of stairs, where a draugr patrols. At the bottom are more catacombs and a second draugr.

Turning left, there is a draugr slumbering in an alcove on your right, and a stone table containing four iron ingots and a copy of the Block skill book The Mirror in front of you. To your left, down a short flight of stairs is an adept-locked iron door leading to a circular room with two large urns and an unlocked chest. Heading west, there is another draugr in an alcove on the left, and another ancient Nord helmet on the ground to the right of you. Continuing to the west, you will pass four more iron ingots in another alcove on your right. Follow the path as it twists and turns, looting any dead draugr as you go. You will pass several draugr in alcoves that will rise as you approach. Keep going until you find a stone table on your left with two gold ingots on top; on the table is also a stone bowl containing five more easily missed gold ingots. Heading due east from the table and climbing over the rubble, you will find an unlocked chest. Keep following the path, looting and defeating any draugr as you go; there are two more draugr roaming the area. You will pass an alcove with two steel ingots in an upper alcove. There are three flame spout traps along the path, and another that is disabled due to being covered with rubble from a cave-in. Eventually you will come to a narrow corridor heading east. Just after it turns to the north, there is a pressure plate that activates a battering ram in front of you. At the end, the corridor opens into a room containing several sets of shelves, which contain eight silver ingots, a potion of minor healing, a potion of healing, a potion of plentiful magicka, and an ancient Nord war axe. At the end of the room is an iron door leading to Forsaken Crypt.
Forsaken Crypt[edit]

Upon entering this area, you will find yourself in a short corridor leading into a large room with an open walkway and a caged walkway both above you at different heights. On your right is a balcony overlooking this room. There is one draugr patrolling this room, and several sarcophagi around the corner, on a raised section under a walkway. Against the east wall are two sets of shelves containing two iron ingots, several cups, bowls, and goblets, and one random potion each of healing, magicka, and stamina. To the right of the shelves is a corridor heading east, leading up a short flight of stairs then turning to the north and climbing another flight of stairs. At the end, you enter more catacombs, with a draugr patrolling and a sideboard in front of you containing a pair of ancient Nord boots and a random helmet. The path turns to the west, then south near some burial urns, then back to the west. Keep following it up a flight of stairs and out onto a walkway above the previous room; this crosses to the balcony, where a draugr will burst forth from one of the sarcophagi. There is an unlocked chest in front of another sarcophagus, while on your left, a set of shelves holds two silver ingots, a random healing potion, and a bowl. The path continues across another walkway to the north, and leads to an iron door that opens into a room with two leveled draugr and a ceiling spikes trap in the middle. There is an expert-locked iron door to the west, and an unlocked iron door in the southeast corner. To the east is a caved-in corridor, with a partially lowered gate in front. There are two tables in the room, each with a burial urn on top. Behind the expert-locked door is a small chamber with an unlocked chest. Passing through the unlocked iron door in the southeast corner, you climb some stairs and cross the caged walkway above the previous room heading south. At the end is a wide corridor with several statues on either side. There is a draugr patrolling this area, and a second in an alcove to the right of the second statue on the left. Around the corner to the north is another alcove on the right with another draugr, then a final draugr in another alcove on your left after turning to the west. There is an iron door in the west wall.

Opening this door will activate a set of swinging blades in the corridor ahead that leads to the final room, where you can see a single sarcophagus. When you approach the sarcophagus, its boss occupant will burst forth and attack. The boss will be aided by four other draugr who are standing by the side walls of the room, one of which is leveled and can be up to an overlord in strength. On your first visit, the boss will be Curalmil, while subsequent visits after the dungeon resets will bring forth a generic leveled draugr boss. The word wall which teaches part of the Marked for Death dragon shout is behind the sarcophagus and up a flight of stairs. There is a boss chest in front of the word wall. Under the word wall is a corridor that leads to an ancient bowl if you are here on the related quest. Activating the bowl will have you pour Nurelion's mixture into it, which lowers the stone wall in front of you and allows access to the final chamber containing the Cracked White Phial.
As you enter this chamber, you will see a sideboard on your left holding a bowl of ectoplasm, a bowl of six deathbell flowers, two orange dartwings, a bowl of five chaurus eggs, and three random poisons. Against the south wall is a stone table holding a copy of the Alchemy skill book A Game at Dinner, two burial urns and two apothecary's satchels. In front on a raised section is a plinth holding the Cracked White Phial. To the north is another sideboard containing two more orange dartwings, a deathbell flower, a bowl of five chaurus eggs, a random poison, and a bowl containing a canis root. To the left is an alchemy lab with a sample of giant lichen, and opposite this is a set of shelves containing a dragon's tongue flower, an orange dartwing, two random poisons, a bowl of frost salts, a bowl of ectoplasm, six torchbug thoraxes in a bowl, another sample of giant lichen, and a bowl of fire salts.
Back in the main chamber, there is an iron door in the southwest corner that leads up a flight of stairs to another iron door, which opens into a small room in Forsaken Cave. Pulling the lever on your right opens a hidden door that brings you back to the dungeon's entrance.
Notes[edit]
- As this location contains numerous burial urns, it is worthwhile to complete the quest No Stone Unturned if one wishes to visit or revisit this location.
Bugs[edit]
- The ceiling spikes trap can cause you to clip through the ceiling and end up on the level above.
- Reloading the game should resolve the issue.
- The ancient Nord boots and random helmet found on a sideboard near the start of the crypt may not respawn with the rest of the ruin. ?
- If you clear the cave, then return later via the exit, the boss room will be reset. When the event is triggered (which isn't until you near the door into the cave), although the lid blows off the Dragon Priest's sarcophagus when triggered, the boss Draugr inside won't get out until you approach him. ?
Maps[edit]
-
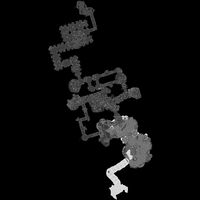
Forsaken Cave
-
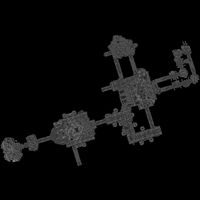
Forsaken Crypt

